Actions
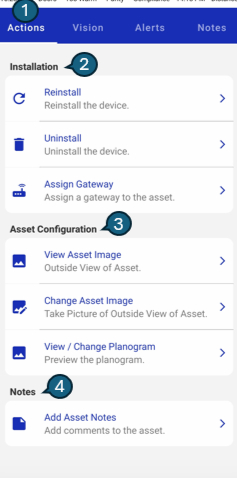
When the Actions tab is selected (default), you will see sections for Installation Actions, Asset Configuration, and Notes. From here, you can choose and perform the desired action based on your requirements.
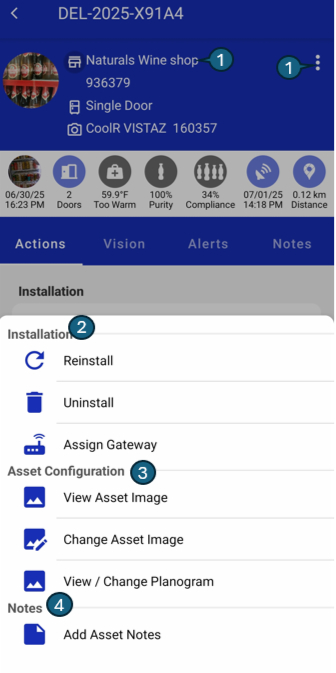
The installation options can be accessed in two other ways: either by tapping the options menu on the right side of the Location Detail screen, or by tapping the location name and code. Both actions will open the Actions sheet, where you can perform installation-related tasks.
1. Installation Actions
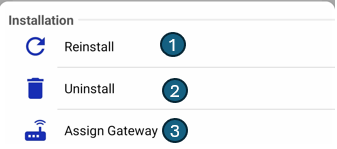
The available installation actions depend on whether a device is assigned to the asset:
- If a device is assigned: The options Reinstall, Uninstall, and Assign Gateway will appear.
- If no device is assigned: Only the Install option will be available.
| # | Action | Description |
|---|---|---|
| 1 | Install | Install a new device to the asset (if no device is assigned). |
| 2 | Reinstall | Reinstall the currently assigned device. |
| 3 | Uninstall | Remove the assigned device from the asset. |
| 4 | Assign Gateway | Assign a gateway to the asset for connectivity. |
2. Asset Configuration
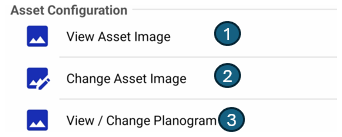
1. View Asset Image
View the current exterior image of the asset to verify its physical condition and placement. You can also delete, share, or update the image directly from this section.
2. Change Asset Image
Capture a new photo of the asset using your device’s camera. After taking a photo, you can either accept (to save and upload the new image to the server) or retake the image if needed.
3. View or Update Planogram
You can preview the current planogram (the arrangement of products inside the asset) or update it by assigning a new planogram. Keeping the planogram up to date helps ensure the asset meets merchandising standards and compliance requirements.
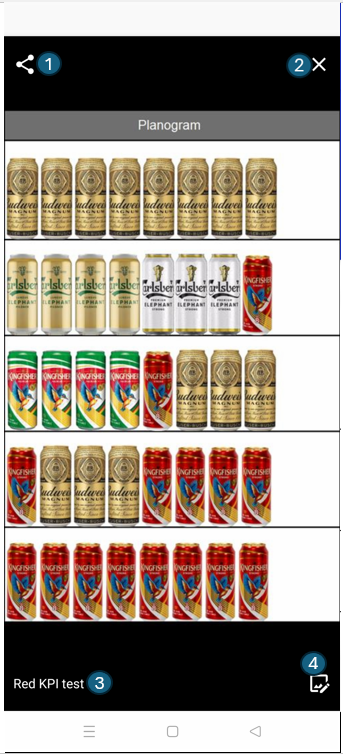
1. Share Icon
Tap this icon to share the planogram image with others using your device’s sharing options.
2. Close Icon
Tap this icon to exit the planogram preview and return to the previous screen.
3. Planogram Name
Displays the name of the currently assigned planogram for easy identification.
4. Edit/Change Planogram
Tap this icon to open the planogram selection screen, where you can update or change the assigned planogram.
To update the planogram, tap the edit/change icon. This opens the change planogram screen:
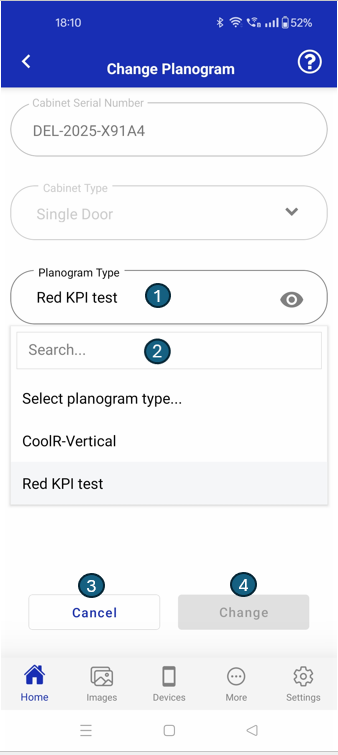
When you tap the Edit/Change Icon, you will see the following options:
1. Planogram Type
Displays the currently selected planogram type for the asset.
2. Search Planogram
Allows you to search and select from the available planogram types in the list.
3. Cancel Button
Tap this button to cancel the operation and return to the previous screen without making changes.
4. Change Button
Tap this button to apply the selected planogram type to the asset.
Each configuration option provides prompts and guidance to ensure changes are applied correctly and securely.
3. Notes
- Add Asset Notes: Add comments or notes related to the asset for better record-keeping and communication. see the Location Detail (Add Notes) page.